




Amazon DataZone is a service that provides a centralized “data mesh” platform for data discovery, access control, and governance.
Amazon DataZone can be seen as an abstraction layer for creating AWS Lake Formation roles and is very useful for data sharing, even cross-account, as we will see in this article.
DataZone is composed of multiple higher-level organisational elements with the following hierarchy :
- Domain(s): Entity defining users, access and project management.
- Project(s): Logical grouping of data assets and users that are related to a specific business use case.
- Environment: Represents a specific stage in the data lifecycle, such as development, testing, or production (inside a project).
- Project(s): Logical grouping of data assets and users that are related to a specific business use case.
The service also administers blueprints. They define a set of tools for data producers for data discovery, access, lineage and metadata. There are multiple available blueprints on Amazon DataZone:
- Data lake blueprint (AWS Glue, AWS Lake Formation, Amazon Athena)
- Data warehouse blueprint (Amazon Redshift)
- Amazon SageMaker blueprint (Amazon SageMaker Studio)
- Custom blueprints
In this article we will explore asset sharing across two AWS accounts.
This article will describe a simple setup and onboarding of DataZone.
In this article, we will use the Data lake blueprint which supports an Athena environment and AWS Glue and Lake Formation support.
Disclaimer: Amazon DataZone is moving to Sagemaker Unified Studio (https://aws.amazon.com/sagemaker/unified-studio/), notably under the service Sagemaker Catalog. Nevertheless, we can still use DataZone by the date of this article without initializing Sagemaker Unified Studio. All features presented in this article should still be available once the service fully moves.
Schema of the architecture used
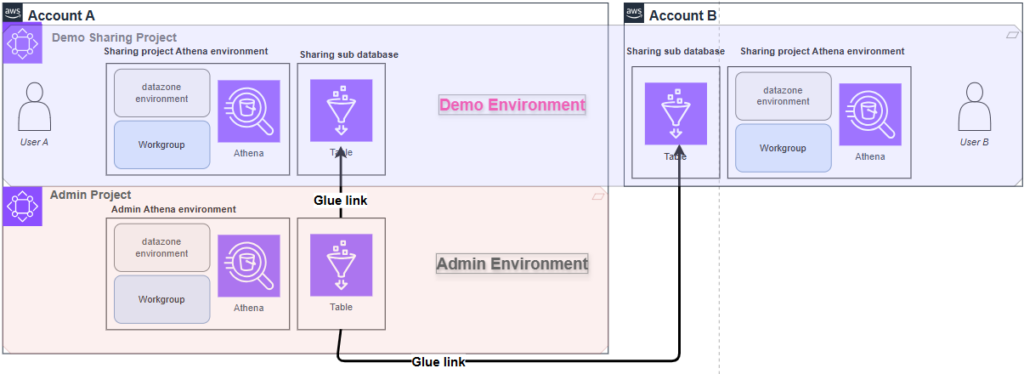
For reference, this is the architecture schema of our final result.
As you can see we have two AWS accounts and two projects: “Admin project” and “Demo Sharing Project”. We will initialise DataZone in Account A, and then share our data with Account B. The Admin Project is created by default by DataZone in the account where we initialize the DataZone domain.
After the initial setup, we will create the “Demo Sharing” project on Account A.
The same environment will be deployed to two different AWS accounts. Using the admin default project, we will publish our first data Asset table to this demo project.
The created project will subscribe to that published Asset.
But first, let’s create our DataZone domain.
Disclaimer: Both AWS accounts we used in this POC are in the same AWS Region.
It is important to keep in mind that we are exploring cross-account sharing here, but not cross-region sharing!
Domain Setup and account association
Let’s start by going to the Datazone service under Amazon Sagemaker. Click on “Create an Amazon DataZone domain”.
For simplicity’s sake, tick the quick setup box and keep the default suggested values for domain creation.
Now, to start managing data cross-account we need to associate two AWS accounts together. To request account association, we copy the target account id (of account B), then we go under “Associate account” section in our DataZone domain:
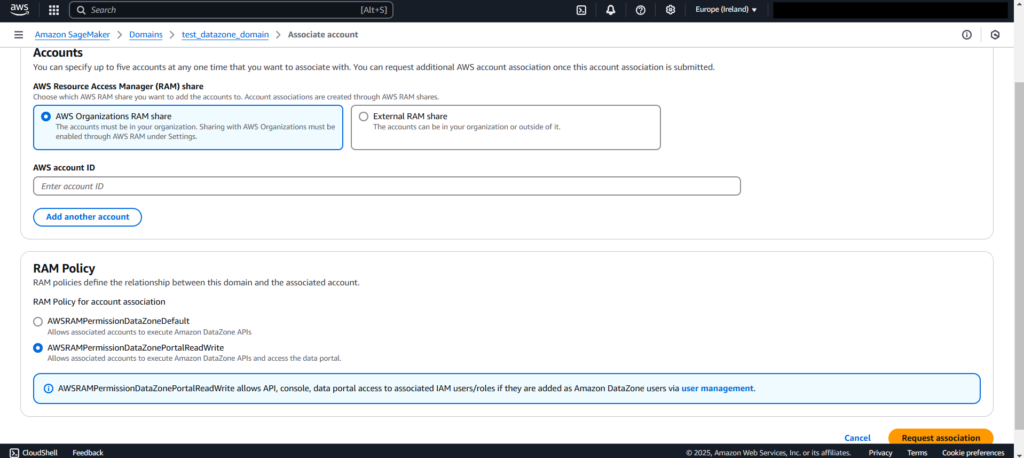
We select the “AWS Organizations RAM share” option, and then paste the target account id under it. Also, don’t forget to tick the “AWSRAMPermissionDatazonePortalReadWrite” policy under “RAM Policy”, so that the target account has access to the DataZone project and its environments.
On the other account, when we go to DataZone, we should find the association request we created. Now click on the review button in the appearing form. Keep all default parameters and accept them.
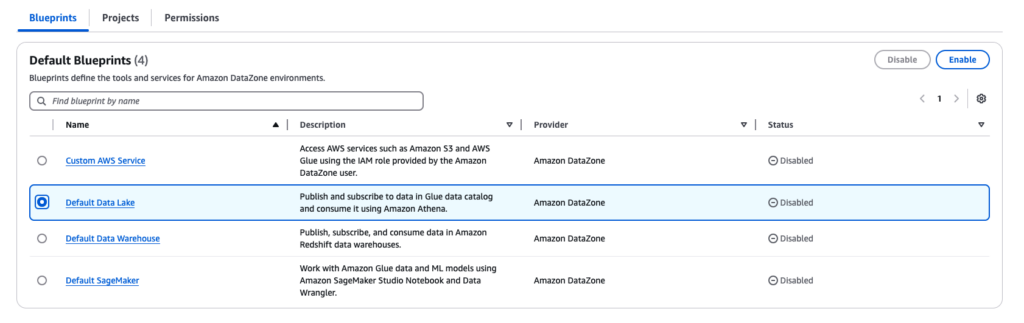
We also need to enable blueprints used by the parent account in the target account.
We will add the Default Data Lake blueprint to the target account, which is the only blueprint we need for our use case.
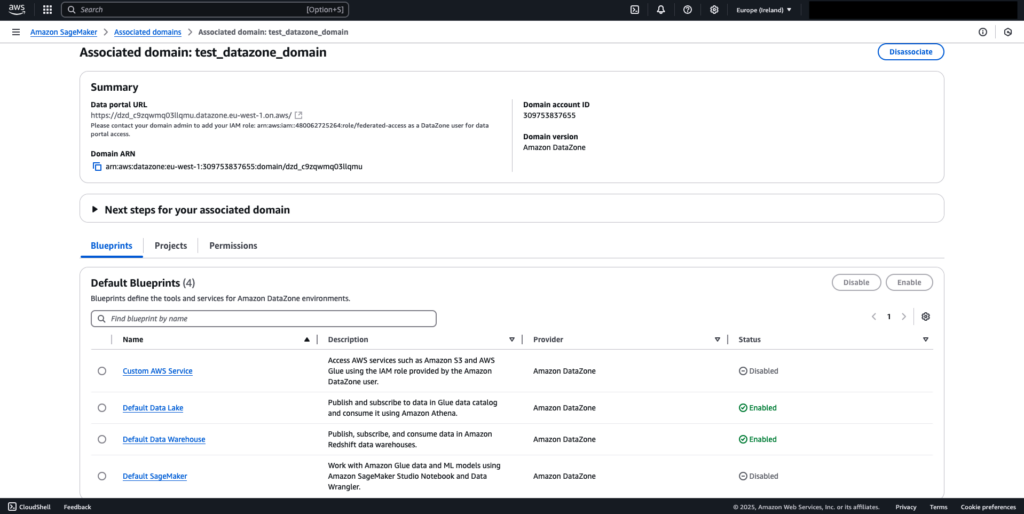
Domain association should look like this after we finished the configuration :
Demo-sharing project creation
As mentioned before, we can find a default project called “admin” in Account A after DataZone domain creation. We will use this project later to share our data asset with the demo project.
Let’s now see how to create a project inside the Amazon DataZone portal using the demo-sharing project as an example.
We will create the project and its environment directly inside the DataZone Data portal.
You can find and access the Data portal URL in the domain overview :

Open the portal, select the project slider on the top left and click the “Create Project” Button. You will see this form:
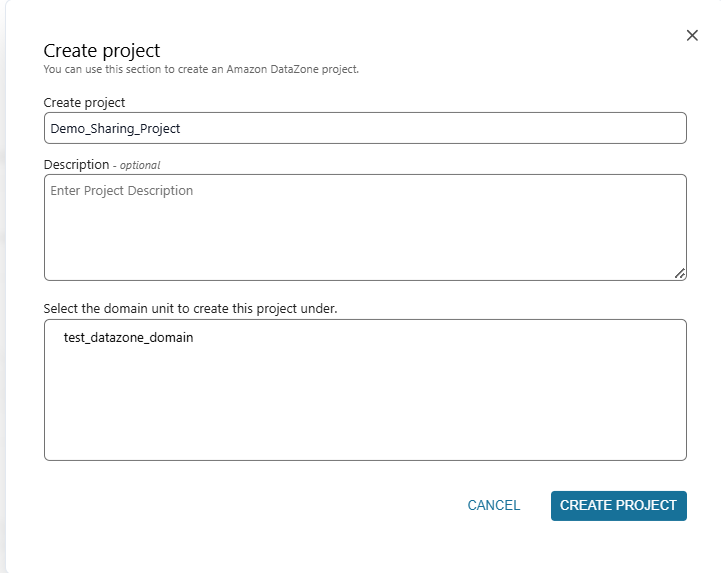
We will keep the project on the default domain unit and name it as displayed above.
We then need to create Datalake environments which will be available on our both AWS accounts (Account A and Account B).
Environment profiles define each environment account, permissions and settings.
These profiles would be used as a base config when creating an environment.
We will create two environment profiles and then reference the different accounts we have.
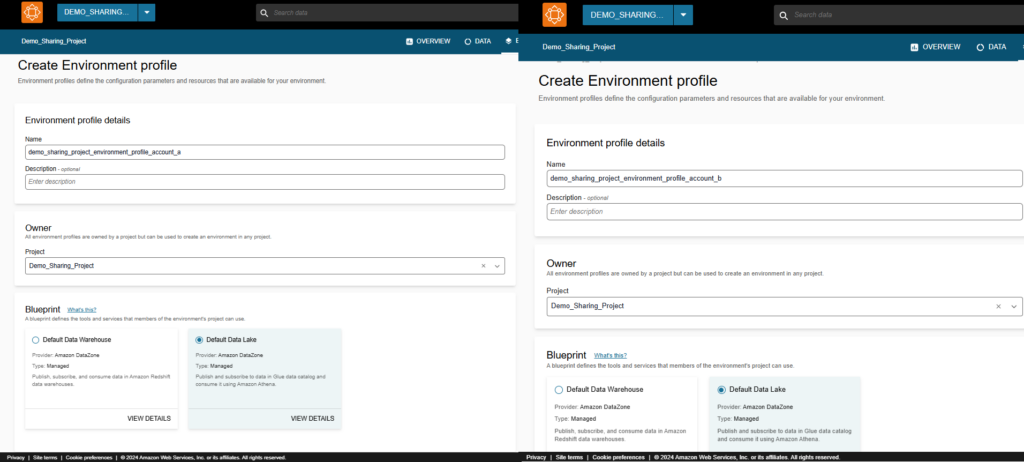
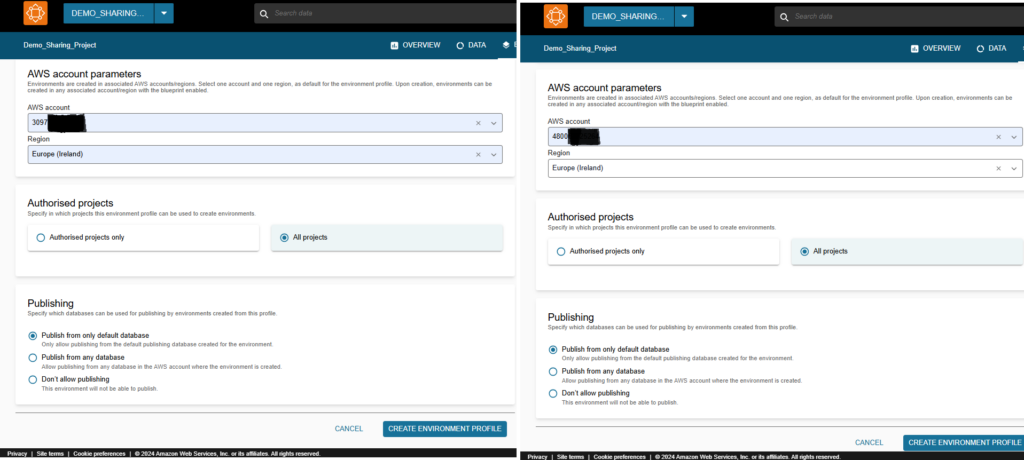
Notice that on environment profile creation, we have to add the account id as well as the target blueprint we want to use for the environment that will be created, and we need to select publishing settings.
On the target account, you need to have those blueprints enabled before.
Once we have our environment profile,s we can use them to create the environments.
An environment will be a collection of tools and services provisioned in the target account as data producers tools that will be governed by DataZone using AWS Lake Formation and RAM under the hood.
Most of these tools will be provisioned by a Cloudformation stack.
Once the environment is created, we should have the following interface when we click on it.
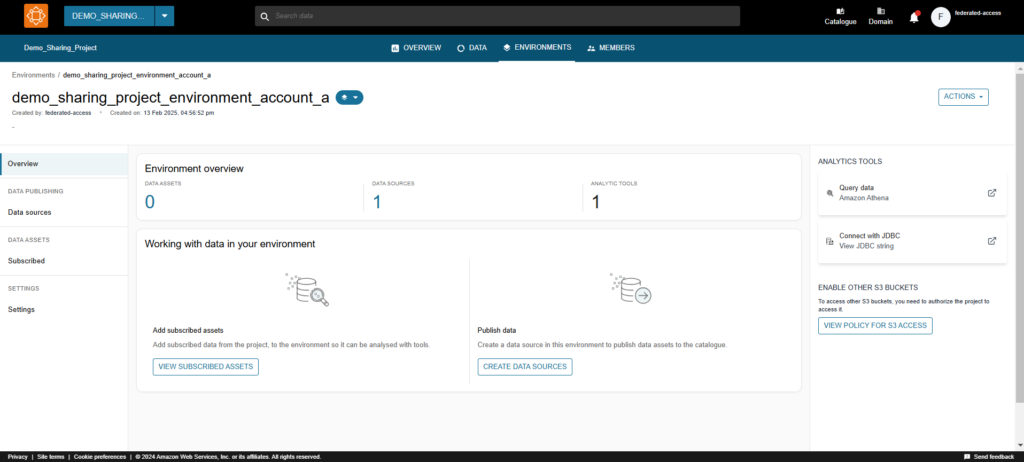
We should also repeat the same steps with the second environment (second environment profile for Account B).
Admin project
Each time a domain is created, we should see a default project called “Admin” inside its portal.
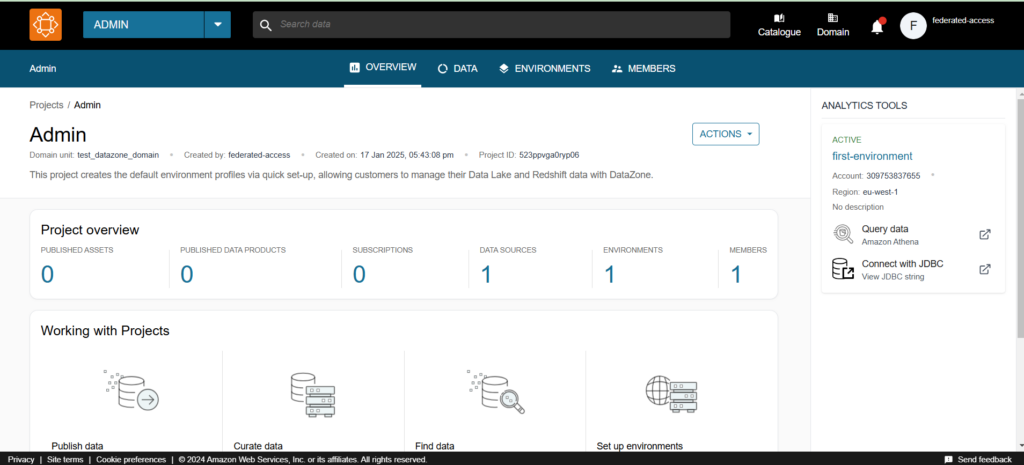
In this project, we will create an environment.
When created on your account A, this environment will provision multiple AWS resources and configurations. Each environment will have (by default) an independent Athena environment as well as two Glue databases:
- Pub database: Environment database that will contain published tables to other environments.
- Sub database: Environment database that will have the subscribed tables from other environments.
On the admin pub database we are going to create a glue table that will reference our sample data with a glue schema.
This data is contained within an S3 bucket on Account A, inside which we uploaded a sample csv file.
To generate the glue schema, we crawl the bucket with a glue crawler.
This allows us to then use this glue table schema to access the data and do Athena requests inside both account A and account B. Let’s see how we can make that happen thanks to DataZone.
First, we will start by publishing the glue database (containing our glue table).
Data sample setup and publishing
To manage data inside DataZone, we will use the pub and sub-databases created in our environment.
If we create a table inside an environment’s pub database, DataZone can manage it in terms of access, metadata, and lineage… which is really useful.
You can check the data source settings under your environment, to find the database or databases which act as a source of data for the environment. We can see the pub database name in the “Data Selection” section.
On that database, we can create our glue tables that we want to be managed by DataZone.

Once done, don’t forget to run the data source. As of now, there are only two ways to have data sources running: scheduled once per day or on demand.
When the data source finishes its run it will have scanned the DB in Data Selection and fetched up new tables created. Below you can see an example of Asset Inventory of one discovered table.
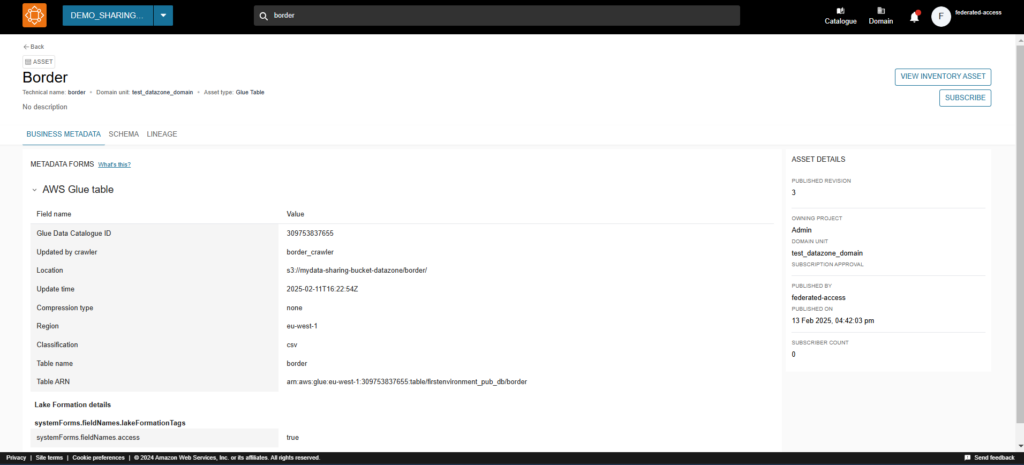
As you can see we have a button to publish the table, which makes it discoverable by other projects and subscribable also.
Since we want to do that with other projects, we are going to publish this table.
Once done, we will receive a notification alerting us that the asset has been correctly published.
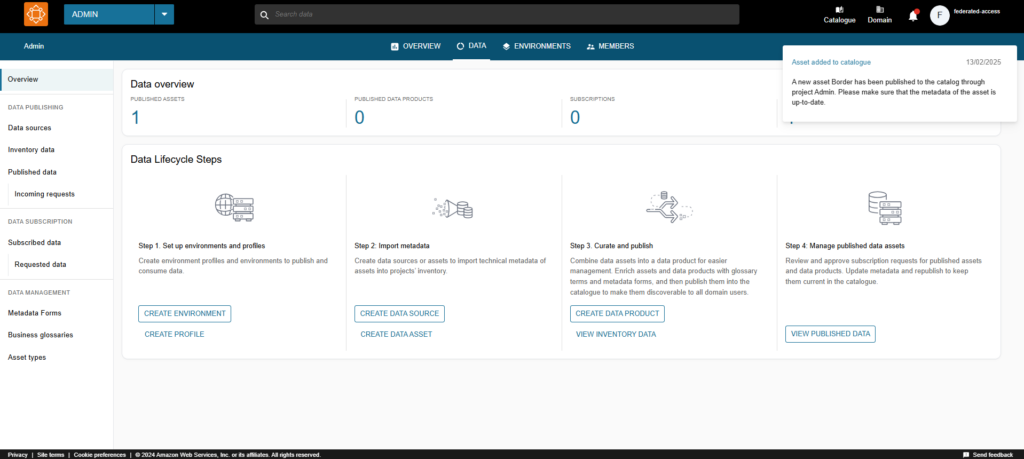
Asset subscription
This section will describe how we subscribe inside the demo project to a data asset located inside the admin project (to get access to our csv file data).
We can start by switching to the demo project, where we will search (using the portal search bar) the asset we want to subscribe to :
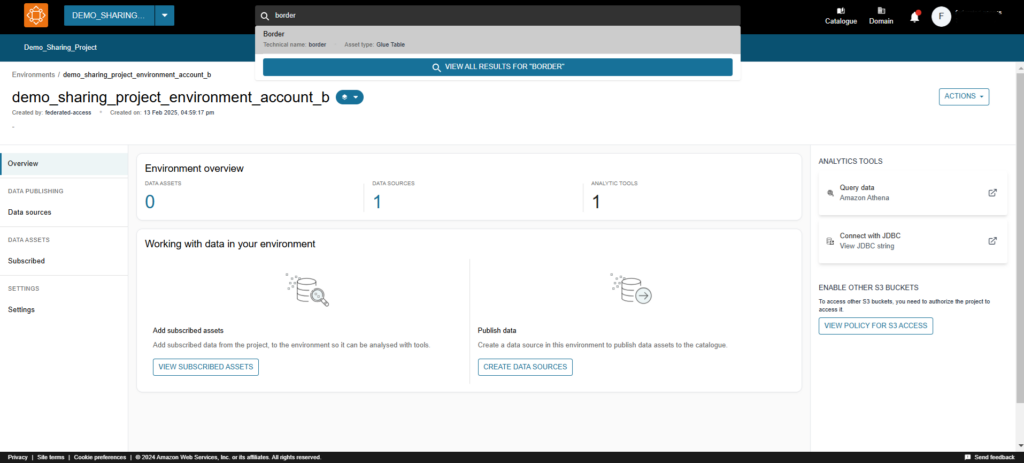
Once the data asset is selected, we can see that a subscription button will be available on the right-hand side of the screenshot below.
Click on the button and make sure to fill out the form the DataZone portal will suggest. Make sure you have the correct asset name as well as the correct target project name.
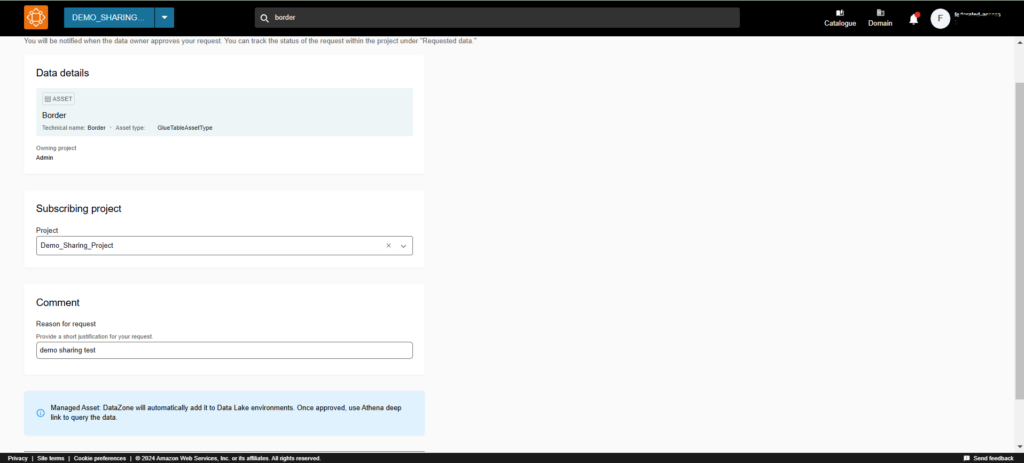
Creating the subscription request will eventually create a notification of a share request on the portal for the source project to review.
In order to validate it, we should switch to the admin project, go to notifications, and see a subscription review. When we click on it, we should see the following form:
We can define full access here or RLS/CLS access using create filters on rows and columns (filters operate the same way as in Lake Formation).
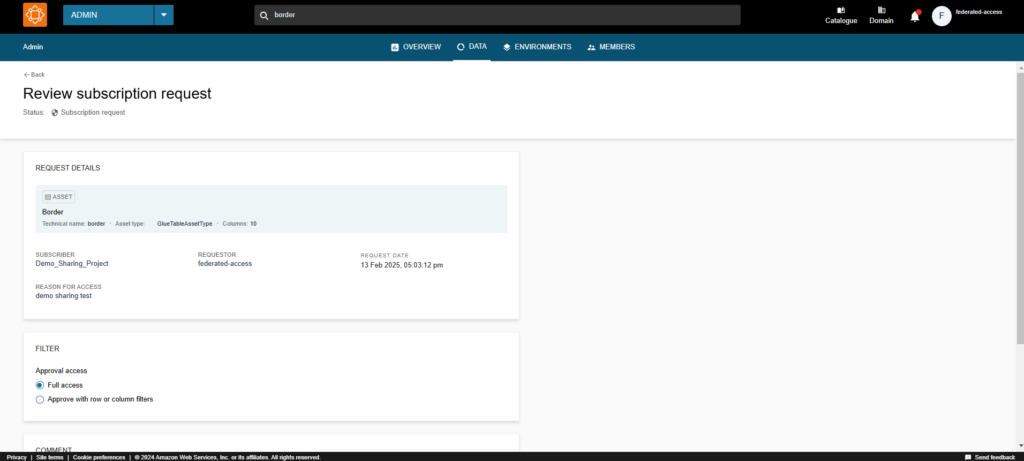
Once approved, the subscription request and the asset will be added as “subscribed” in the target project. DataZone will add the asset inside both environments of the demo project, which belong to different AWS accounts (cf. architecture schema).
It will also handle all permissions and access settings internally.
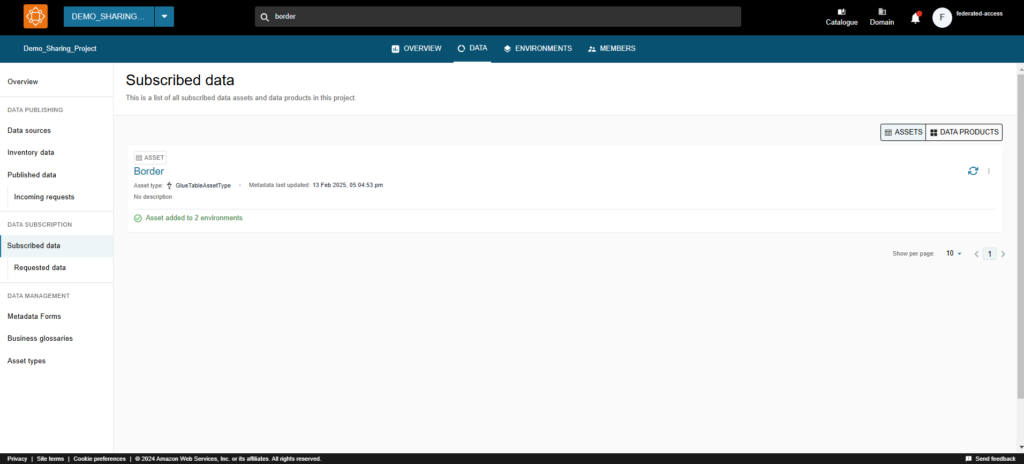
This screenshot shows how the asset is added to both environments. Since we are using the Datalake blueprint, we should have a proper Athena environment and workgroup that were automatically created per environment, which will allow us to access our data.
Asset access
This section describes data access considering Account A as a central portal which can have access on account A and account B Athena environments.
We start by searching for the asset we want to access, and then we click on the name of our asset. You will see the following page :
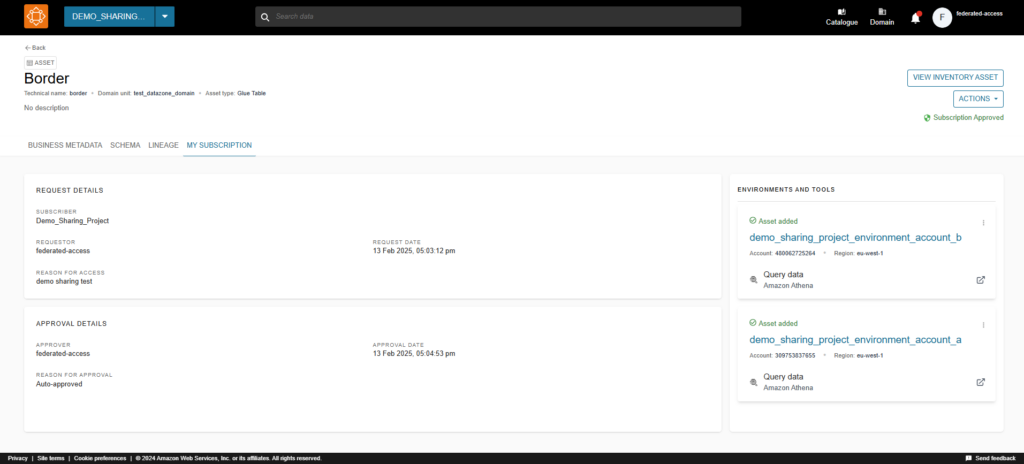
As you can see, it displays details about the asset and on the “My Subscription” tab, we can see that it is added to both environments of “demo_sharing_project”.
When going to a demo project’s environment, we can see that on each environment, we have “Analytics tools” on the right-hand side. These are links we can click to query data in an Athena environment managed by DataZone.
When we click on “Query data”, it should take us directly to Athena.
This is a central access method. From the portal, we can check every project environment whether it’s in the same account or not.
Once on the Athena service, notice that since it’s an environment managed by DataZone we don’t see any workgroup switcher, but we have a datazone environment chosen for us, as well as an IAM role which we are assuming. This role and environment were created during the creation of the DataZone project environment.
As you can see below, we are able to query our bucket data inside Athena :
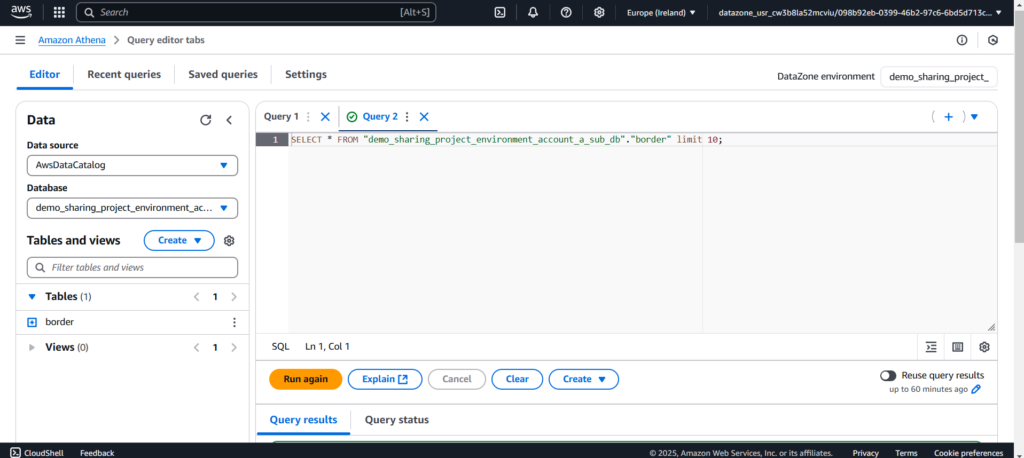
We can access data assets on separate accounts without going through the Amazon DataZone portal by using the “datazone_usr_*” IAM role provided at the environment creation.
Each datazone environment will provision an access role that will be called “datazone_usr_*”.
To use it, we should start by switching role on the datazone_usr_* role as follows :
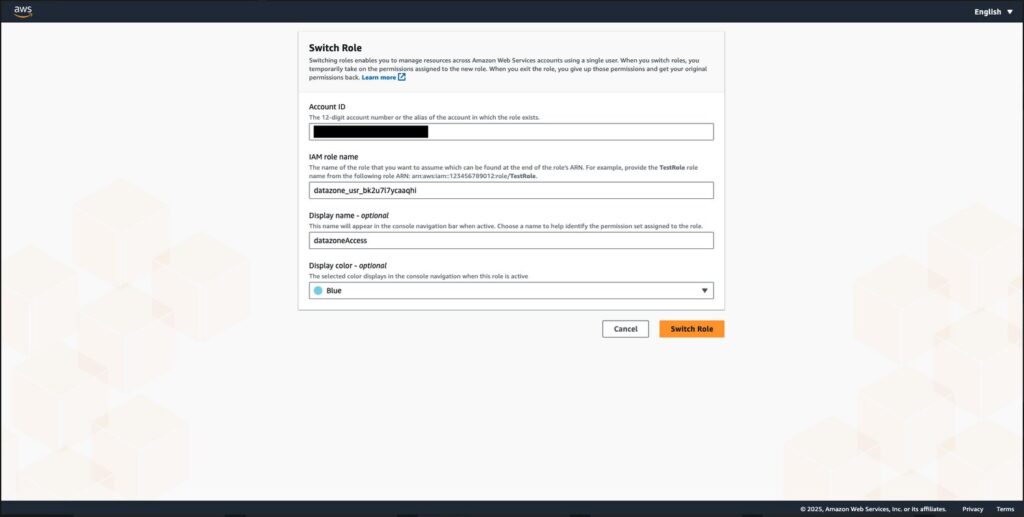
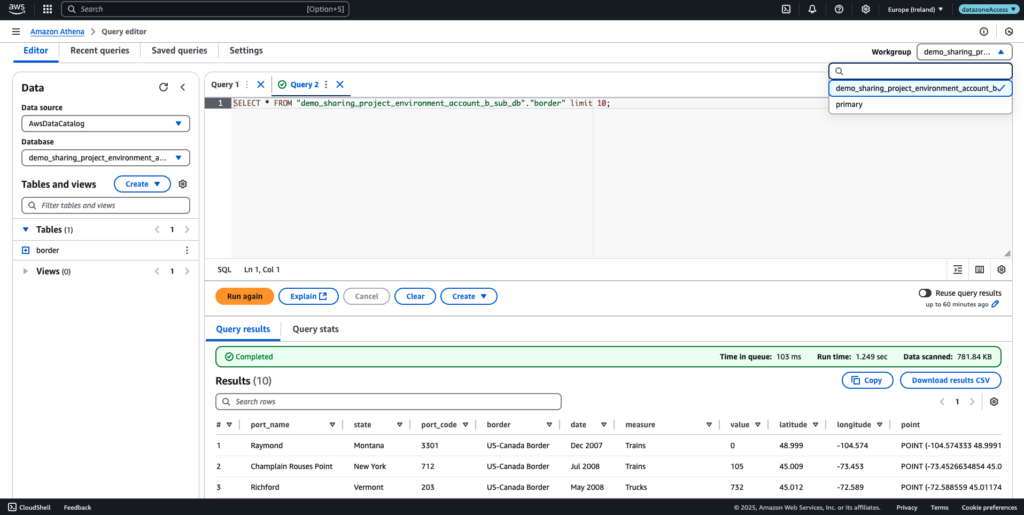
After the role switch, if we go under Athena we should have access to the workgroup managed by Amazon DataZone. We also can query the same data from Account B, as you can see here, and we see that DataZone selected by default the correct workgroup when we opened Athena from inside the DataZone portal from account B :
Cleanup
When finished, it’s important to clean up your resources.
Start by unsubscribing from assets on the demo sharing project, unpublish and delete the asset on the admin project. Then, delete the demo project and its environment (start by deleting environments first).
Afterwards, you can delete the glue databases (pub & sub). Also delete the S3 bucket we used along with workgroup Athena and cloudwatch Log Groups.
Pro & Cons
Pros of using DataZone:
- Centralised data sharing tool: DataZone provides a centralised platform for data discovery, making it easy for users to access and share the data across different AWS accounts.
- Enforced data access control: DataZone helps to enforce data access control by allowing organisations to define and manage access policies for their users (domain unit or project management), projects (asset management), and data assets (Rows and columns RLS/CLS).
- Support for multiple data sources: DataZone supports a variety of data sources, making it easy for organisations to share data from different sources (including Amazon EMR, Aurora and Redshift).
Cons of using Amazon DataZone :
- DataZone is still a relatively new service, and there may be some kinks to work out (the documentation is also not always reliable yet).
- DataZone can be complex to set up and configure, especially for large organisations with complex data-sharing needs.
- DataZone may not be necessary for all use cases. If you have a small number of S3 buckets and a simple data-sharing need, you may be able to get by without using DataZone, as it can be more expensive and cumbersome.
- DataZone is not yet compatible with all data sources or data formats (for example, view subscription is not supported for now)
- The service badly scales up under heavy loads (errored operations after a few hundred parallel actions)
- Very verbose API, inconsistent response time, infrequent timeouts.
Conclusion
Amazon DataZone is a relatively new service, with new features being added regularly (such as the lineage feature announced recently). It is very interesting, especially from a Data Engineer perspective.
We can view it as an abstraction layer of Lake Formation. It makes handling and managing Lake Formation easier, and the automatic role creation is really helpful. DataZone could be worth trying if you already use or plan to use the LakeFormation service, as it simplifies the headache of its configuration.
As mentioned in the introduction, DataZone service is actually moving to Sagemaker Unified Studio to become Sagemaker Catalog. The service itself will have the same features as DataZone, plus other improvements and new features belonging to Amamzon SageMaker suite. You can compare both services using the Sagemaker catalog demo here https://aws.storylane.io/share/szmiwp3unlio (make sure to choose demo catalog in Choose your journey list)
Since DataZone is a lakehouse, it is also helpful in managing access and governing data from various data sources – even across different accounts, as we saw in this article. Overall, it is a service that grows by the day and it is definitely worth keeping an eye on it!